
Learn to build a hands-on DIY African Djembe Drum with everyday items, teaching rhythm, culture, and teamwork in a fun, eco-friendly project.
Building your own DIY African Djembe Drum is more than a craft project—it’s a gateway to understanding West African music, culture, and the fundamentals of rhythm. This hands-on activity uses simple recycled materials to create a goblet-shaped drum that invites children to tap, thump, and explore percussive patterns while learning about cooperation, patience, and creative problem-solving. Whether you’re a parent, teacher, or youth leader, this step-by-step guide makes drum-making accessible, educational, and wildly fun.
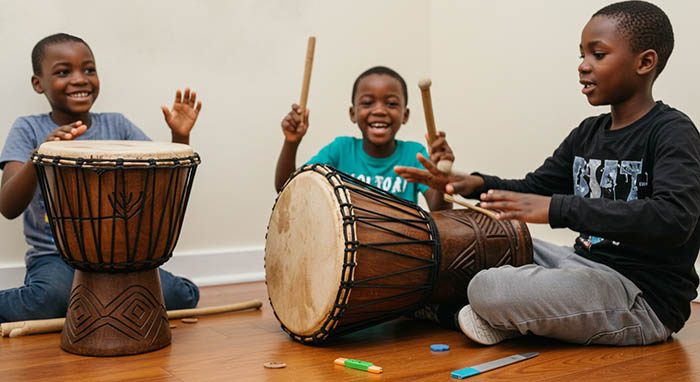
Why a DIY Djembe Drum Is Perfect for Kids
The djembe drum (pronounced “jem-bay”) is a centuries-old percussion instrument from West Africa, traditionally carved from a single piece of hardwood and covered by goat or cowhide. Its goblet shape produces deep bass notes, bright slaps, and versatile tones—ideal for teaching dynamics and timing. When kids build a homemade version, they learn:
- Sequencing and Planning: Following a multi-step process from cleaning materials to tuning the drumhead
- Fine Motor Skills: Cutting, taping, painting, and tying require precision and hand-eye coordination
- Cultural Appreciation: Exploring the history and purpose of djembes in African ceremonies, storytelling, and community gatherings
- Collaborative Creativity: Decorating and testing rhythms together fosters teamwork and communication
Hands-on drum construction turns abstract concepts like tension, resonance, and beat into tangible lessons.
Materials You’ll Need
Gather common household items and recycled pieces to build your African Djembe Drum:
| Material | Purpose |
|---|---|
| Two sturdy paper or plastic cups | Drum body (goblet shape) |
| Balloon, greaseproof paper, or fabric | Drumhead |
| Rubber band(s) | Secure drumhead |
| Duct tape or masking tape | Reinforce cup joints and decoration |
| Glue (PVA or hot glue) | Assemble body and attach drumhead |
| Scrap yarn or ribbon | Simulate traditional rope tuning |
| Markers, paint, or stickers | Decorate with African patterns |
| Small stones or dried beans | Weight inside base for stability |
| Scissors | Cut cups and head material |
Optional tools: ruler for grid patterns, stencil for African symbols, fabric scraps for decorative tassels.
Step 1: Assemble the Drum Body
Start by creating the goblet-shaped shell:
- Cut the Cups: Remove the bottom of one cup so it forms a funnel. If using plastic cups, trim carefully with scissors.
- Join the Pieces: Invert a second cup (with the bottom intact) and insert the trimmed cup into it, creating a goblet shape. Use duct tape around the joint for a secure, airtight seal.
- Stabilize the Base: Place a handful of small stones or dried beans into the sealed cup base. This adds weight and prevents tipping during play.
At this stage, you have a hollow, weighted goblet that mimics the traditional djembe form.
Step 2: Create and Attach the Drumhead
The drumhead transforms your shell into a playable instrument:
- Choose Head Material: A stretched balloon produces bright tones; greaseproof baking paper offers a crisp slap; thin fabric yields a warmer sound.
- Cut to Size: If using a balloon, cut off the rounded end—stretch it over the cup’s open rim. If using paper or fabric, cut a circle 2 cm larger than the rim.
- Secure with Rubber Bands: Stretch the head material taut over the rim and fix it with one or more rubber bands. Ensure uniform tension by adjusting bands until the surface feels springy but not loose.
- Reinforce with Tape: Wrap a strip of masking or duct tape around the edge to hold the bands and seal gaps.
Tip: To fine-tune tension, adjust rubber bands or add more wraps—tighter heads yield higher pitches.
Step 3: Decorate Your Drum
Personalize with African-inspired art:
- Geometric Patterns: Use a ruler and markers to draw concentric circles, triangles, and zigzag lines reminiscent of West African textile designs.
- Symbolic Motifs: Paint Adinkra symbols or cowrie shell shapes to evoke Ghanaian and Malian traditions.
- Fabric Tassels: Glue short strips of colorful yarn or ribbon around the rim to simulate rope lacing found on authentic djembes.
- Stickers and Beads: Apply locally sourced beads or animal print stickers for added texture.
Encourage kids to research a symbol’s meaning before painting—this deepens cultural learning.
Step 4: Introduce Basic Rhythms
Once dry and secure, your drum is ready for playing:
- Bass Tone: Thump the center of the drumhead with a cupped palm.
- Tone: Strike the edge with fingertips to produce mid-range notes.
- Slap: Snap the fingers sharply on the rim for crisp accents.
Teach simple call-and-response patterns:
- Heartbeat Beat: Bass–tone–bass–tone (1-2-1-2)
- Boom-Tap Pattern: Bass–slap–tone–slap (1-3-2-3)
- Rhythmic Name Game: Spell a child’s name by assigning one beat per letter.
These exercises build coordination, listening skills, and an intuitive feel for polyrhythms.
Step 5: Explore Cultural Context
The djembe is central to communal activities:
- Ceremonial Drumming: Traditionally used in weddings, harvest festivals, and healing rituals
- Storytelling: Griots (West African storytellers) use drums to punctuate tales and proverbs
- Group Performance: Ensembles of djembes, dunun drums, and dancers create immersive call-and-response experiences
Invite a short discussion: How did communities use these drums? What emotions do different rhythms convey? This conversation ties hands-on making to intangible heritage.
Variations and Extensions
Keep the fun evolving with these twists:
- Eco-Drum Challenge: Build a djembe head from discarded plastic bags or aluminum foil for sustainable experimentation.
- Djembe and Dance: Combine drumming with basic West African dance moves—such as step touch, swirl, and stomp—to embody rhythm.
- Rhythm Relay Race: Divide kids into teams; each team passes the drum with a 4-beat pattern, racing to maintain the sequence flawlessly.
- DIY Multi-Drum Ensemble: Construct smaller cups for djun-djuns (bass drums) and pandeiro-style shakers, creating a mini percussion band.
These activities reinforce sequencing, teamwork, and improvisation.
Troubleshooting Tips
- Floppy Drumhead: Add more rubber bands or tighten existing ones for better tension.
- Rattling Base: Increase stone or bean weight, or double-tape the bottom seam.
- Uneven Tone: Check tape overlaps and ensure head material is centered before securing.
- Decor Peeling: Use a stronger adhesive or seal decorations under clear tape for added protection.
Every fix is a mini-lesson in debugging and design thinking.
Teaching Through Play and Reflection
After drumming, lead a brief debrief:
- What patterns felt easy or tricky?
- How did you solve tension or stability issues?
- Which colors or symbols did you choose, and why?
Encourage kids to journal a “Drum Diary” with sketches, rhythms they invented, and reflections on teamwork. This metacognitive step cements learning and celebrates creativity.
FAQ: Common Questions
Q: Can I use metal tins instead of cups?
A: Yes—metal tins yield deeper tones. Just ensure edges are sanded and sealed to avoid cuts.
Q: How long does a homemade head last?
A: Balloon heads last 1–2 weeks with regular use; paper heads may fray sooner. Replace or retension as needed.
Q: Are these drums weather-proof?
A: Not fully—avoid outdoor rain and store in a dry area to protect the paper and adhesive.
Q: What ages is this suitable for?
A: With adult supervision, ages 5+ can handle assembly; ages 8+ can lead decoration and basic tension adjustments.
Conclusion
Your DIY African Djembe Drum is now more than a craft—it’s a cultural ambassador and a rhythmic companion. Through glue, tape, and recycled cups, children learn sequencing, craftsmanship, and the universal language of beat. Each tap teaches patience, each pattern hones listening, and each decoration weaves in global heritage. Gather your young percussionists, strike a steady heartbeat, and let the drum speak stories of West Africa, community, and boundless creativity.

I’m a longtime enthusiast of creative play and creative magic. I’m passionate about transforming everyday materials into extraordinary fun. I explore, test, and refine each project, ensuring it sparks joy, fuels imagination, and is delightfully achievable for families and educators. Driven by the belief that the best toys often come from imagination. I love empowering others to create playful memories.