
Learn how to build a DIY saltwater circuit to light LEDs using simple kitchen ingredients. Explore conductivity, circuit design, troubleshooting, and STEM extensions in this hands-on guide.
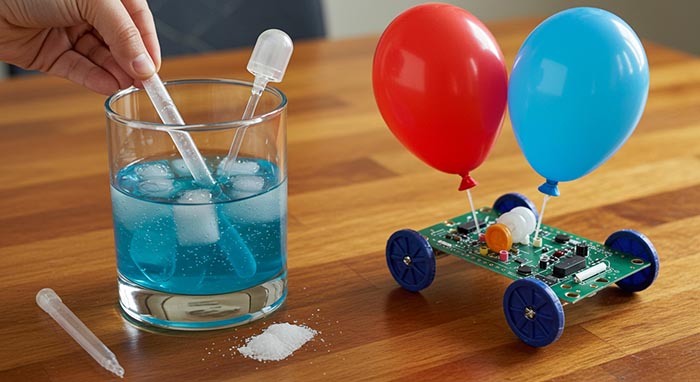
Transform everyday trash into a high-speed STEM project by constructing a balloon-powered racer from recycled materials. This hands-on activity teaches kids about air pressure, force, Newton’s laws of motion, and the engineering design process. We’ll guide you through gathering supplies, designing your chassis, building axles and wheels, integrating a balloon propulsion system, testing performance, and exploring science concepts. Whether you’re a parent, teacher, or DIY enthusiast, this project sparks creativity, sustainability awareness, and a love of physics—all with stuff you already have at home.
Why a Balloon-Powered Racer?
A balloon-powered car is an ideal STEM toy for several reasons:
• Low cost, high impact: Use recycled boxes, bottle caps, and straws—no fancy kits needed. • Immediate feedback: Watch your racer zip forward in seconds. When it stalls, you debug in real time. • Core physics principles: Demonstrates Newton’s Third Law, energy conversion, friction, and aerodynamics. • Engineering design practice: Plan, build, test, iterate—just like real engineers. • Environmental message: Upcycling encourages resourcefulness and reduces waste.
By the end of this guide, kids will understand how stored potential energy in a stretched balloon becomes kinetic energy to propel a racer—and how design tweaks like wheel alignment and balloon size affect speed and distance.
Materials You’ll Need
Most items can be scavenged from your recycling bin or found at a dollar store. Gather:
| Category | Items |
|---|---|
| Recycled Containers | Small plastic bottles (500 mL), juice boxes, or cardboard milk cartons |
| Wheels | Bottle caps (4 per car) or cardboard cut into discs |
| Axles | Wooden skewers, chopsticks, or straight plastic straws |
| Propulsion | Balloons (round or long “twisting” varieties) |
| Connectors & Tools | Flexible straws, rubber bands, tape (masking, duct), hot glue |
| Cutting & Measuring | Scissors, hobby knife (adult use only), ruler |
| Decoration (optional) | Paint, markers, stickers, washi tape |
| Testing & Analysis | Stopwatch, measuring tape, notebook for recording results |
Optional: small beads for low-friction bearings, felt pads for “calm down” base, and graph paper for recording distances.
Overview of the Engineering Process
We’ll follow the classic Engineering Design Process in this project:
- Define the problem: Build a racer powered solely by balloon thrust.
- Research & brainstorm: Study balloon cars online and sketch chassis ideas.
- Plan & design: Draw a blueprint, choose your materials, and list steps.
- Build & test: Assemble the prototype and run initial trials.
- Evaluate & iterate: Analyze performance, identify failure points, redesign.
- Communicate: Share results, challenges, and solutions with classmates or family.
This cyclical approach ensures continuous learning and improvement.
Step 1: Design Your Chassis
Begin by selecting a body that will hold your balloon and axles. Two simple options:
- Plastic Bottle Body: Clean and dry a small plastic soda or water bottle.
- Cardboard Box Body: Cut a cereal box or juice carton into a rectangular “car” shape.
Tips for Chassis Design
• Center of Gravity: Keep weight low to prevent flipping. Attach axles near the bottom edge. • Balloon Mount Point: Plan a secure spot on top or back for your balloon’s straw or nozzle. • Wheelbase Width: Ensure axles protrude equally on both sides to fit wheels without wobble. • Length & Weight: A longer wheelbase offers stability; lighter bodies accelerate faster but decelerate quickly.
Sketch your chassis side view and top view on paper, labeling axle slots and balloon mount positions before cutting.
Step 2: Build the Axles and Wheels
Accurate, low-friction axles are crucial. Follow these steps:
2.1 Prepare the Axles
- Cut axles: Trim two skewers or straight straws to a length slightly wider than your chassis width (chassis + 1 cm on each side).
- Smooth ends: Sand or file skewer ends to avoid puncturing parts or the balloon.
2.2 Attach Wheels
- Drill or punch holes: On each side of the chassis, mark and create two holes perfectly opposite each other for the axle. Holes should be snug—not too tight or too loose.
- Mount wheels: Press bottle caps (wheels) onto each axle end, securing them with a small drop of hot glue or clay inside each cap.
- Insert axles: Slide axles through chassis holes. Wheels should spin freely without sliding axially.
Troubleshooting Axles
- If wheels stick, wrap a tiny layer of tape around the axle near the chassis to act as a spacer.
- If the wheels wobble, add small felt washers between the cap and chassis wall.
- If wheel friction is high, switch to plastic straw axles inside larger straws as bushings.
Step 3: Integrate the Balloon Propulsion System
This is where stored energy becomes motion. Here’s how:
3.1 Balloon-Straw Connection
- Attach balloon to straw: Insert the straight end of a flexible straw into the balloon’s neck. Secure with a tightly wrapped rubber band.
- Test seal: Inflate the balloon via straw; pinch the straw tip—no air should escape.
3.2 Balloon Mounting
- Cut a small slot: On your chassis top or back end, cut a hole just large enough for the straw to pass through.
- Position the straw: Push the straw through from inside so that the balloon sits on top or behind the chassis.
- Secure assembly: Tape or hot-glue the straw in place, ensuring it points toward the rear at a slight downward angle to direct airflow against the ground behind the car.
Step 4: Final Assembly and Decoration
Once axles, wheels, and the balloon system are in place:
- Reinforce chassis: Tape or glue any weak seams. Add extra cardboard flap supports under the chassis if needed.
- Decorate: Paint your racer, add stripes, eyes, or sponsor logos—let kids personalize their vehicles.
- Label: Write names or car numbers with a marker.
A well-aligned, well-decorated car not only looks great but reduces drag and improves tracking.
Step 5: Testing and Troubleshooting
5.1 Initial Run
- Inflate balloon: Blow through the straw until the balloon is firm (not overinflated).
- Block airflow: Pinch the straw end with your finger.
- Place on track: Set the racer on a smooth, flat surface (hardwood floor or laminate).
- Release: Lift your finger and watch it go.
5.2 Common Issues
• No movement: – Check balloon seal and ensure straw tip is clear. – Verify axles spin freely—unstick wheels. • Cars wobble or veer: – Adjust axle hole alignment so both sides are parallel. – Ensure balloon thrust is centered. • Slow or short travel: – Inflate balloon more. – Reduce chassis weight or friction (sand wheel hubs, use smoother surface).
Record each test’s distance and time in a table for analysis.
Step 6: Tuning for Performance
Small design tweaks yield big results. Experiment with:
| Variable | Modification | Expected Effect |
|---|---|---|
| Balloon size | More/less inflation | More thrust vs. shorter burn time |
| Chassis weight | Add/remove clay or tape | Heavier = slower start, longer coast |
| Axle diameter | Swap straw/skewer sizes | Thicker for stability, thinner for speed |
| Wheel type | Bottle caps vs. cardboard discs | Friction differences |
| Surface type | Carpet vs. smooth floor | More/less friction |
| Thrust angle | Tilt straw up/down slightly | Traction vs. lift/drag trade-off |
Encourage kids to change one variable at a time, using a controlled experiment approach—perfect for scientific method practice.
The Science Behind the Racer
Understanding physics deepens the learning experience.
Newton’s Third Law
“For every action, there is an equal and opposite reaction.”
When air rushes out of the balloon toward the rear, it pushes the racer forward with equal force.
Energy Conversion
- Potential energy: Stored in the stretched balloon material and compressed air.
- Kinetic energy: Released as the balloon deflates, converting to the motion of both air and the car.
- Dissipation: Some energy dissipates as sound, heat (friction), and vibrations—explaining why the racer eventually stops.
Friction and Drag
- Rolling friction between wheels and surface opposes motion.
- Air resistance (drag) grows with speed and affects performance.
Discuss ways to minimize friction (smoother axles, smaller contact area) and drag (streamlined chassis).
STEM Learning Objectives
This project covers multiple curriculum standards:
- Physics: Newton’s laws, energy conversion, friction
- Engineering: Design thinking, prototyping, iteration
- Mathematics: Measurement, data analysis, graphing results
- Environmental Science: Recycling materials, reducing waste
- Technology: Understanding propulsion and mechanical systems
Frame lessons around these objectives and embed vocabulary: potential energy, kinetic energy, thrust, drag, and coefficient of friction.
Cross-Curricular Extensions
Mathematics
- Distance & Speed: Measure run length; compute speed = distance ÷ time.
- Graphing: Plot performance improvements over successive designs.
- Ratios: Balloon volume vs. distance traveled.
Language Arts
- Technical writing: Craft a how-to guide or lab report.
- Reflection prompts: “What design changes improved performance?”
- Persuasive pitch: “Convince a friend why your racer is the fastest.”
Art & Design
- Aerodynamic livery: Explore race car aesthetics and functional design.
- Branding exercise: Create team names, logos, and color schemes.
Environmental Science
- Life-cycle analysis: Trace how your recycled materials would otherwise become waste.
- Upcycling challenge: Design a racer using only materials from a single household bin.
Classroom and Workshop Variations
- Racing Tournament: Split into teams, hold elimination heats, and track the fastest and farthest distances.
- Design Constraints: Limit materials to cardboard only, or maximum balloon size, to spur creativity.
- Collaborative Builds: Pairs each tackle one element—axles, chassis, or propulsion—and merges at the end.
- Data-Driven Improvement: Each round, analyze data, then decide as a group which variable to tweak next.
- STEM Showcase: Host a fair where students present their designs, process, and findings to visitors.
In all formats, emphasize iteration and documentation: sketching designs, logging results, and reflecting on outcomes.
Assessment and Reflection
Formative Assessment
- Observation: Is the student using correct terminology—“thrust,” “drag,” “loop?”
- Questioning: Ask learners to predict how changes will affect performance.
- Checklists: Ensure prototypes meet design requirements (four wheels, balloon mount, etc.)
Summative Reflection
Have students complete a Racer Report:
- Design sketch and rationale
- Materials list
- Pseudocode for build steps
- Data table of trials (distance, time, variables changed)
- Analysis: What worked, what didn’t, next steps
- Scientific principles demonstrated
This comprehensive report reinforces communication skills and conceptual understanding.
Troubleshooting and Common Pitfalls
| Problem | Symptom | Fix |
|---|---|---|
| Wheels don’t turn freely | Car doesn’t move | Realign axle holes; remove excess tape; add felt washers |
| Balloon leaks | Car moves little or not at all | Re-seal balloon-straw junction; use fresh rubber band; test beforehand |
| Chassis wobbles | Car veers or flips | Lower center of gravity; widen wheelbase; reinforce chassis edges |
| Short run distances | Balloon deflates too quickly | Add glue or glycerin to slow airflow; reduce hole size; inflate less |
| Uneven thrust | Car veers to one side | Align straw centrally; ensure even air exit angle |
Encourage a growth mindset: each failure is an opportunity to learn and refine.
Advanced Extensions
- Multi-Balloon Power: Experiment with two balloons for longer thrust phases.
- Regulated Valves: Build simple pinch-or-slide clamps to introduce control structures—like valves in code (“if gas, open valve; else, close”).
- Automated Timing: Integrate a smartphone sensor or light gate to measure acceleration and deceleration profiles.
- Obstacle Courses: Design a winding track that requires students to code in conditionals (“if front wheel touches wall, turn left 90°”).
- Aerodynamic Shell: Enclose the chassis in a streamlined cardboard “body” and compare drag effects.
These advanced projects build toward project-based learning and real-world engineering problems.
Safety and Maintenance
- Supervision: Hobby knife and hot glue use require adult oversight.
- Check for sharp edges: Sand or tape exposed cardboard flaps.
- Balloon caution: Monitor for latex allergies.
- Seal integrity: Periodically inspect mounts and seals to prevent sudden air leaks.
Store racers in a dry place. Replace balloons every few uses to avoid fatigue-induced bursts.
Conclusion
Building a balloon-powered racer from recycled materials blends creativity, physics, and environmental stewardship into one dynamic STEM project. From sketching chassis designs and cutting axles to inflating balloons and tuning performance, children experience the full cycle of engineering—defining problems, prototyping solutions, testing hypotheses, debugging, and iterating. They witness firsthand how potential energy stored in a balloon bursts forth as kinetic energy, propelling their creations across the floor. The activity reinforces coding concepts like loops and conditionals through real-world analogies and fosters cross-disciplinary connections in math, art, and environmental science.
Whether raced at home, in a classroom tournament, or showcased at a science fair, these DIY racers inspire curiosity, resilience, and teamwork—laying a foundation for future careers in engineering and beyond. So gather your recycled bits, sketch that blueprint, and let your imagination—and balloons—take you on a thrilling ride. Human-powered or balloon-powered, the spirit of innovation lives in every trial, error, and triumphant sprint across the finish line.

I’m a longtime enthusiast of creative play and creative magic. I’m passionate about transforming everyday materials into extraordinary fun. I explore, test, and refine each project, ensuring it sparks joy, fuels imagination, and is delightfully achievable for families and educators. Driven by the belief that the best toys often come from imagination. I love empowering others to create playful memories.