
Build a hands-on robot path game with arrows and tape to teach kids sequencing, debugging, and computational thinking—no programming needed.
Imagine turning your living room or backyard into a coding dojo where children learn the fundamentals of programming—sequencing, loops, conditionals, and debugging—without writing a single line of code. That’s the magic of an unplugged robot path game made with nothing more than masking tape and paper arrows. In this activity, kids design a physical “program” by laying arrow cards on the floor and watching a toy robot (or even a trusted teammate) follow their instructions step by step. Beyond pure fun, this project builds computational thinking, collaborative problem-solving, and creative confidence, making it a perfect STEM lesson for parents, teachers, or DIY enthusiasts.
Why Create a Robot Path Game?
Teaching coding as a set of abstract symbols on a screen can feel distant and intimidating for beginners. By contrast, a physical path game grounds programming in the tangible world. When kids place an arrow card on the floor—pointing up, down, left, or right—they’re literally mapping out each instruction. Seeing a robot follow those directions transforms abstract concepts like sequencing and debugging into concrete experiences. This hands-on approach accelerates understanding of programming logic, reduces screen fatigue, and invites playful iteration: change one arrow, rerun the sequence, and instantly observe the result.
Materials You’ll Need
Masking tape or colored painter’s tape (for your “grid” on the floor) Paper or cardstock (to cut arrow cards) Markers or printed arrow templates (↑, ↓, ←, →, loop, conditional) A small toy robot or rolling vehicle (hot-wheels car, programmable robot, or even a stuffed animal on wheels) Scissors, ruler, and measuring tape (for consistent grid spacing) Optional: colored sticker dots, timer, “bug” cards to simulate errors
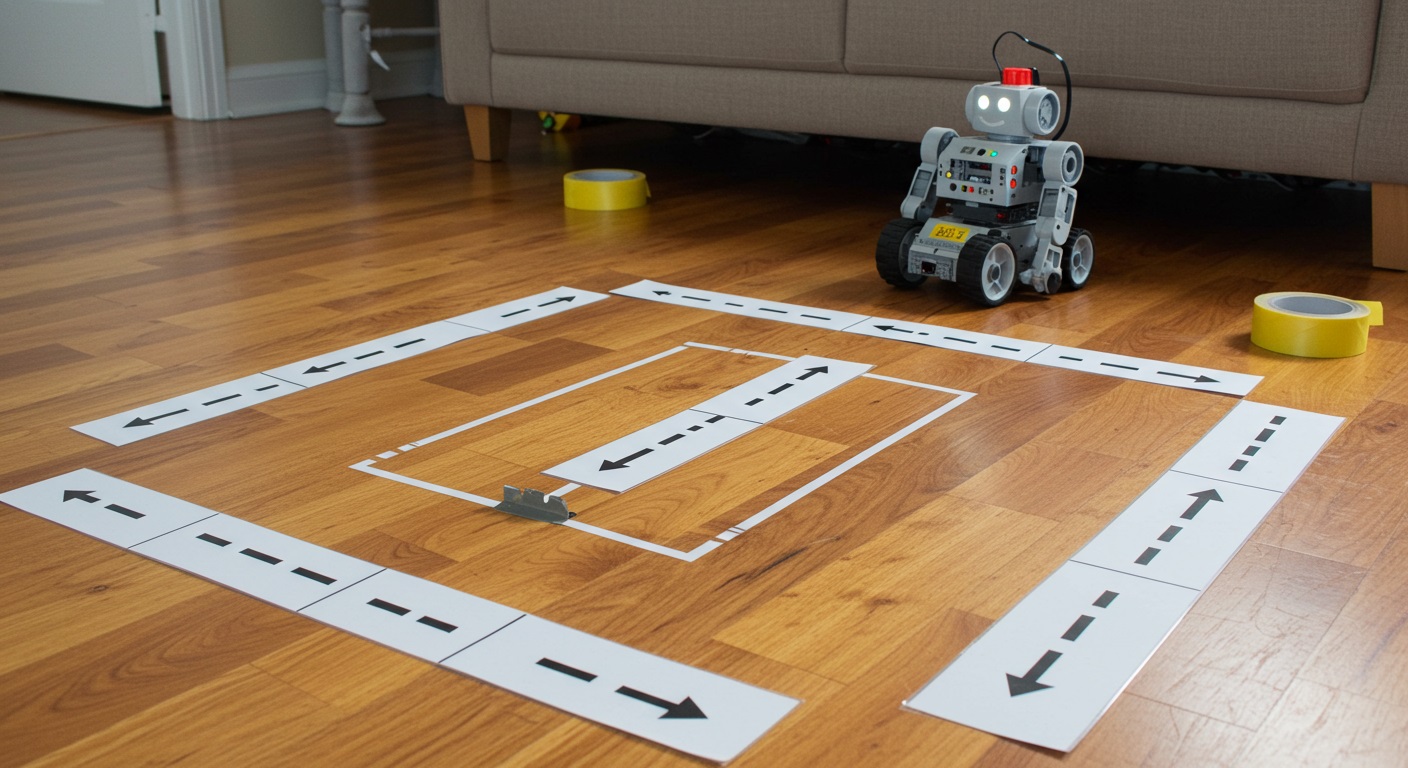
Setting Up the Grid
First, choose a flat play area: living room floor, classroom tiles, garage, or patio. Use masking tape to create a grid of uniform squares—4 to 6 inches per side works well. A 6×6 or 8×8 grid provides enough room for mazes and challenges without overwhelming the space. Number the rows and columns lightly with chalk or removable labels so you can reference coordinates. This grid becomes your “memory” where arrow cards will be placed.
Designing Arrow Cards
On cardstock, draw large arrows indicating up, down, left, and right. Color-code each direction—green for forward (↑), red for back (↓), blue for left (←), and yellow for right (→). If you plan to teach loops, create a circular arrow card labeled “LOOP X times” and space for a number. For conditionals, use cards that read “IF obstacle ahead” or “IF corner reached” with a branching arrow pointing to two different next-step cards. Laminate or cover cards with tape to ensure durability.
Gameplay Overview
Players become “programmers.” They design a path by laying arrow cards on the grid, starting at a designated “Start” square and ending at the “Goal.” Once the sequence is complete, the “robot” (toy or peer) follows the cards exactly. If the robot veers off course, that indicates a bug in the sequence—and it’s time to debug. Players revise their arrow layout, retest the path, and iterate until the robot reaches the goal flawlessly.
Step 1: Define the Challenge
Decide on a theme and challenge level. For beginners, place a single obstacle—a block or cup—on the grid and ask kids to navigate around it. For more advanced play, set up multiple obstacles, “traps” (squares they must avoid), or special zones that require conditional logic (e.g., “if on a red square, turn left”). Give a brief narrative: “Help Robo-Rex escape the lava pit” or “Guide Agent Z to the secret intel drop.” A thematic story boosts engagement and frames the debugging process as heroic.
Step 2: Lay Out the Sequence
Starting at the “S” square, players place arrow cards in adjacent grid squares, planning a continuous path to the “G” goal. Encourage them to think through each move: “One forward, one right, two loops forward, then left.” Emphasize that each arrow is one instruction—the robot won’t guess beyond what’s provided. Teach them to simulate mentally or walk the path themselves before committing to cards.
Step 3: Run the Program
Place the robot or instruct a teammate (“robot”) to stand on the “S” square. They follow each arrow in order, moving one square per instruction. You can time the run to add excitement or track how many “bugs” occur before success. If the robot misses a turn or bumps an obstacle, that’s a failed test. Celebrate the discovery—it’s exactly what real programmers experience.
Step 4: Debug and Iterate
Debugging is the heart of coding. Ask players to identify where the sequence went wrong by retracing each arrow card. Did they forget a turn? Place two forward arrows instead of one? Use sticky dots to mark incorrect steps. Then remove, replace, or rearrange cards to fix the path. Each debug cycle reinforces logical reasoning, attention to detail, and patience.
Step 5: Introduce Loops and Conditionals
Once sequencing basics are solid, challenge kids to simplify repetitive paths with loops. For example, instead of placing five forward arrows, use a “Loop 5 times” card followed by a single forward arrow. Teach them loop syntax—“Repeat __ times”—and have them test the shorthand notation. For conditionals, place a “Stop if obstacle ahead, else move forward” card. This introduces branching logic: if the robot sees an obstacle, it must change course; otherwise, it continues straight. Use color-coded zones to simulate sensor input—“If you’re on blue, turn right; if on green, turn left.”
Variations to Keep It Fresh • Time Trial Mode
Who can design and debug a working path in under five minutes? A stopwatch adds fun tension.
- Blind Programming: One child designs the sequence, another executes it blindfolded, following only arrow cards. This tests the clarity of instructions.
- Team Relay: Divide into squads. Each squad member lays one or two arrows before tagging the next teammate to continue. This fosters collaboration and communication.
- Maze Creation: Build walls with books or blocks, forcing players to route around dead ends.
- Random Bug Cards: Draw a card at intervals that introduces a new obstacle or flips part of the grid, forcing on-the-fly debugging.
Learning Outcomes
Players develop core computational skills: sequencing (breaking tasks into ordered steps), abstraction (using loops to compress repetitive actions), conditional logic (branching based on criteria), and debugging (identifying and fixing errors). They also sharpen soft skills: communication (explaining logic to teammates), resilience (persisting through failed tests), and creativity (designing unique mazes and challenges).
Extensions and Cross-Curricular Links
Integrate math by adding coordinate-based clues: “Go to (3,2) then turn right.” Explore writing by having kids script a narrative walkthrough, matching each arrow. Tie into science by creating a “chemical reaction” zone that only activates if the sequence includes a conditional step. For older learners, challenge them to document their “code” in pseudo-code, then translate it into a simple block-based program in Scratch or micro: bit firmware.
Tips for Success
Start simple—ensure early wins to build confidence. Use bright colors and clear icons to prevent confusion. Encourage players to verbalize each step before placing arrow cards. Celebrate every debugging discovery as a marker of learning. Keep extra arrow cards and tape on hand for quick adjustments. Rotate roles—designer, tester, debugger—to give everyone practice in each programming skill.
Conclusion
Building a robot path game with arrows and tape transforms mundane floors into dynamic learning arenas. By physically laying out algorithms, testing sequences, and iterating through bugs, children gain an intuitive understanding of programming logic. This unplugged approach bridges concrete play with abstract code, making STEM positive, collaborative, and accessible. So grab your tape, cut your arrows, and let the coding adventure begin—no computer required.

I’m a longtime enthusiast of creative play and creative magic. I’m passionate about transforming everyday materials into extraordinary fun. I explore, test, and refine each project, ensuring it sparks joy, fuels imagination, and is delightfully achievable for families and educators. Driven by the belief that the best toys often come from imagination. I love empowering others to create playful memories.