
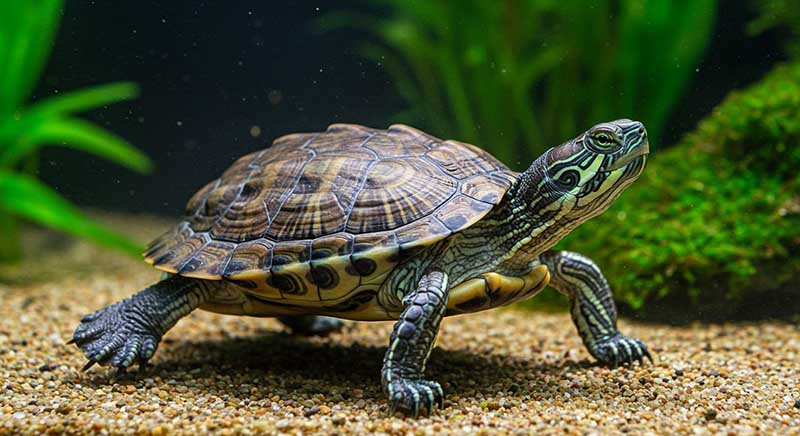
Turtles are fascinating reptiles that captivate pet owners with their calm demeanor and unique aquatic behaviors. While they may appear low-maintenance, turtles require a highly specific and clean environment to remain healthy and thrive. The secret to a long and active turtle life is consistent, effective tank maintenance. This comprehensive guide will walk you through the full process of maintaining a turtle tank like a professional, helping you provide the ideal habitat for your shelled companion.
Why Maintaining a Turtle Tank Is So Important
Unlike fish, turtles are messy eaters, and they defecate frequently. Their aquatic environment quickly accumulates waste, leftover food, and algae, making water quality degrade faster than many aquarists expect. Poor water quality leads to a range of serious problems:
- Shell rot and infections: Dirty water encourages fungal and bacterial infections on the shell and skin.
- Respiratory illnesses: Turtles can develop pneumonia from inhaling bacteria-filled droplets.
- Algae overgrowth: Algae thrive in neglected tanks, causing green water and slippery surfaces.
- Ammonia spikes: Decomposing waste increases ammonia, which burns the turtle’s skin and eyes.
- Foul odors: Dirty tanks smell bad and can make indoor spaces unpleasant.
Regular maintenance keeps your turtle healthy, your home odor-free, and your tank looking clean and attractive.
Step 1: Know the Key Components of a Proper Turtle Tank
A well-maintained turtle tank starts with good design. If your tank setup is flawed, even the best cleaning routine won’t be enough.
Tank Size
- A good rule is 10 gallons of water per inch of shell per turtle.
- A single adult red-eared slider (a common pet turtle) usually needs a minimum of 75 to 100 gallons.
Filtration System
- Turtles need strong filtration due to their high waste output.
- Choose a canister filter rated for 2–3 times the size of the tank.
- Mechanical, biological, and chemical filtration are all essential.
Basking Area
- Turtles need to dry off completely to avoid shell rot.
- Include a floating dock, rock ledge, or platform accessible by ramp.
- The basking area should be dry, stable, and spacious enough for your turtle to lie comfortably.
UVB Lighting and Heating
- Turtles require UVB light to metabolize calcium and maintain bone/shell health.
- Provide 12 hours of light daily using a bulb designed for reptiles.
- The basking spot should be kept at 85–90°F using a heat lamp.
Substrate (Optional)
- Bare-bottom tanks are easiest to clean.
- If using substrate, opt for large river rocks or sand. Avoid small gravel, which turtles may ingest.
Tank Cover
- A mesh or screen cover helps prevent escapes and keeps other pets out.
Step 2: Daily Maintenance Routine
Daily care prevents major problems and supports the turtle’s health.
Check Equipment
- Ensure filters are running properly.
- Confirm heater and UVB light are on.
- Monitor water temperature (75–80°F for aquatic turtles).
Remove Debris
- Skim out uneaten food 20–30 minutes after feeding.
- Use a turkey baster or aquarium net to remove floating waste.
- Wipe glass if condensation or film appears.
Observe Your Turtle
- Look for signs of illness:
- Swollen eyes
- Lethargy or floating
- Lack of appetite
- Discolored or flaking shell
Check Water Clarity and Odor
- Clear water with no strong smell indicates healthy conditions.
- Cloudy water or unpleasant odor signals the need for water changes.
Step 3: Weekly Maintenance Tasks
Each week, dedicate 30–60 minutes to a thorough cleanup.
Perform a Partial Water Change
- Remove 25–50% of the water using a siphon or gravel vacuum.
- Replace with dechlorinated water that is temperature-matched.
- Partial changes help dilute toxins and prevent pH fluctuations.
Clean Tank Surfaces
- Scrub algae from glass, rocks, and basking area using an algae scraper or magnetic cleaner.
- Avoid household cleaning products; stick to vinegar and water or reptile-safe solutions.
Rinse and Reposition Decor
- Rinse rocks and artificial plants in hot water.
- Rearrange items to keep the turtle mentally stimulated.
- Remove any loose pieces the turtle could swallow.
Check Filter Media
- Open the filter and inspect sponges and cartridges.
- Rinse media in tank water (not tap water) to preserve beneficial bacteria.
- Replace chemical media (like carbon) every few weeks.
Step 4: Monthly and Deep Cleaning Tasks
Over time, biofilm and mineral buildup occur. Once a month (or every 4–6 weeks):
Full Equipment Check
- Inspect hoses, intake tubes, heater probes, and seals.
- Clean filter housing thoroughly.
- Replace UVB bulbs every 6–9 months, even if they still light up (UV output diminishes).
Deep Clean Decor
- Soak decor in hot water with a touch of vinegar.
- Scrub stubborn algae with a toothbrush.
- Let everything air-dry completely before returning to the tank.
Deep Clean Tank (Only If Necessary)
- If water clarity or smell doesn’t improve after maintenance, do a 70–90% water change.
- Temporarily house the turtle in a secure tub with heat and cover.
- Clean all tank components with hot water and wipe surfaces.
Step 5: Optimize Feeding Habits to Reduce Waste
What you feed and how you feed affects tank cleanliness:
Use a Feeding Tub
- Move your turtle to a separate container for feeding.
- Reduces waste entering the main tank.
Remove Uneaten Food Promptly
- Turtles don’t always eat everything immediately.
- Leftover food rots quickly, promoting ammonia spikes.
Use Pellet Feed
- Pellet foods dissolve slower and are easier to clean up.
- Supplement with fresh greens and protein (crickets, worms) in moderation.
Step 6: Algae Control Techniques
Algae are natural but should be managed.
- Reduce lighting hours to 8–10 hours per day.
- Keep the tank away from direct sunlight.
- Add algae-eating snails or fish (with caution).
- Use a UV clarifier or algae magnet.
- Never use harsh chemical algaecides in a turtle tank.
Step 7: Troubleshooting Common Water Quality Issues
Green Water
- Caused by excess light and nutrients.
- Reduce lighting or upgrade the filter.
- Consider a UV sterilizer.
Cloudy Water
- Bacterial bloom in new tanks or from overfeeding.
- Do partial water changes and avoid over-cleaning filter media.
Bad Odors
- Caused by decaying matter or dirty filters.
- Clean decor, do water changes, and scrub filter components.
Algae Buildup
- Happens with prolonged light exposure.
- Reduce light and clean surfaces more frequently.
Tips for Success
- Create a maintenance schedule and stick to it.
- Label equipment (buckets, nets) used only for turtle care.
- Use test kits to monitor ammonia, nitrite, nitrate, and pH.
- Log changes and readings in a notebook or app.
- Teach children safe and proper cleaning techniques if they help.
Supplies Checklist
- Siphon or gravel vacuum
- Turkey baster or skimmer net
- Algae scrubber or magnetic cleaner
- Dechlorinator or water conditioner
- Water test kit
- Separate feeding container
- Spare filter media
- White vinegar for cleaning
- Soft toothbrush for detailing decor
Clean Tank, Healthy Turtle, Happy Keeper
Turtles are long-lived, rewarding pets when provided with proper care—and it all starts with a clean tank. By following daily, weekly, and monthly maintenance routines, you create an aquatic habitat that mirrors their natural environment, supporting both physical and psychological health. A clean tank prevents disease, reduces stress, and gives you peace of mind.
With commitment, the right tools, and a little scheduling, turtle tank maintenance becomes second nature. Your turtle will reward you with vibrant health, active behavior, and years of loyal companionship.
Remember: a healthy turtle begins with a healthy tank. Clean like a pro, and you’ll build a happy, thriving habitat for your shelled friend.

I specialize in transforming homes into pet havens. I offer practical tips on creating safe environments, selecting stimulating toys, designing enriching spaces for pets, risk prevention strategies and daily care routines that prioritize animal well-being. Discover science-based solutions for happier, healthier companions.