
Teach kids gravity, drag, and motion with a simple paper helicopter craft. Fun, hands-on STEM learning for all ages.
Exploring science doesn’t have to involve expensive equipment or complicated experiments. Sometimes, the simplest tools create the most powerful learning moments. A paper helicopter toy is one of those tools—a low-cost, fun, and highly effective way to teach kids about physics.
With just a piece of paper, scissors, and curiosity, children can explore forces like gravity, air resistance, and rotational motion in real time. This hands-on activity is perfect for parents, teachers, caregivers, and even science enthusiasts looking for a quick and engaging STEM (Science, Technology, Engineering, and Mathematics) lesson.
Why Use Toys to Teach Physics?
Children learn best when they can touch, see, and interact with the concepts being taught. Toys naturally grab their attention and make abstract topics relatable. Instead of simply hearing about physics, kids experience it when they create and test a paper helicopter.
Benefits of hands-on learning:
- Increases engagement and curiosity
- Encourages problem-solving skills
- Builds confidence in exploring science
- Makes abstract principles easier to understand
Why a Paper Helicopter Works Perfectly for Physics
Paper helicopters demonstrate several fundamental physics concepts at once, making them ideal for learning:
- Gravity – the force pulling everything toward the center of the Earth.
- Air resistance (drag) – the friction created by air, which slows down falling objects.
- Rotational motion – how the helicopter spins because of uneven forces on its blades.
- Stability and weight distribution – adding weight to the bottom stabilizes its path.
Because these concepts are visible while the toy is in motion, children immediately understand the effect of these forces.
A Short History of the Paper Helicopter Concept
The idea of spinning wings isn’t new. In fact:
- Leonardo da Vinci sketched designs for an “aerial screw” in the 15th century, which resembles the motion of a helicopter.
- Maple tree seeds, also known as samaras, naturally spin as they fall, inspiring similar designs.
- Modern helicopters use the same principle—blades create lift and stability while spinning.
By making a paper helicopter, kids are essentially recreating a simple version of these historical and natural designs.
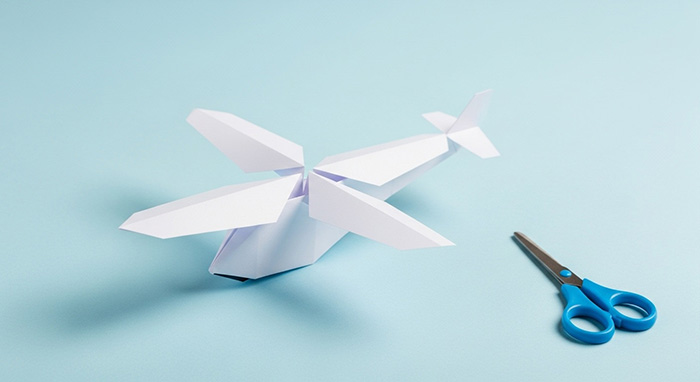
Materials Needed
The best part of this activity is its simplicity. You don’t need to visit a specialty store; you probably have everything at home:
- 1 sheet of lightweight paper (printer paper, notebook paper, or even recycled paper)
- Scissors
- Paper clips or tape (for adding weight)
- Ruler and pencil (optional, for precision)
- Markers or crayons (optional, for decoration)
How to Make a Paper Helicopter: Step-by-Step
Step 1: Cut the Base Strip
Cut a strip of paper approximately 5 cm (2 inches) wide and 15 cm (6 inches) long. The dimensions don’t have to be perfect, but keeping them rectangular helps stability.
Step 2: Create the Rotor Blades
Find the top of the strip and cut down the center about halfway. These two sections become the rotor blades.
Step 3: Fold the Blades
Fold one blade forward and the other backward so they point in opposite directions. This is key to creating rotational motion.
Step 4: Fold the Bottom
Fold the bottom edge upward two or three times to create weight. Secure it with a paper clip or tape if you want a more stable drop.
Step 5: Decorate (Optional)
Add color, patterns, or even a name to personalize the toy. Creativity adds excitement to learning.
How to Use the Paper Helicopter for Teaching Physics
Step 1: Make Observations
Have children hold the helicopter by the top and drop it from shoulder height. Watch how it spins as it falls. Ask them:
- Why do you think it spins instead of falling straight?
- Does it fall fast or slow? Why?
Step 2: Experiment With Variables
Encourage kids to modify and compare different designs:
- Blade length: Make one helicopter with longer blades and one with shorter blades. Which spins longer?
- Weight: Add an extra paper clip. Does more weight increase speed?
- Paper type: Try lightweight notebook paper versus heavier cardstock. Which one spins better?
- Drop height: Drop it from a table versus a staircase (with supervision). Does height change the spin time?
These simple experiments introduce the scientific method: hypothesize, test, observe, and conclude.
Physics Concepts in Depth
Gravity
Gravity is constant, pulling the helicopter downward. By observing how the helicopter always falls regardless of design, kids learn that gravity acts equally on all objects near Earth’s surface.
Air Resistance
The wide blades push against the air, creating drag. Drag slows the helicopter’s fall, allowing kids to see the difference between a spinning toy and a crumpled paper ball.
Rotational Motion
When the blades bend in opposite directions, air pushes unevenly on each side. This imbalance creates rotation, giving the helicopter its spinning effect.
Stability and Weight
Adding weight at the bottom lowers the helicopter’s center of gravity, helping it fall straight instead of wobbling.
Ideas for Classroom or Group Activities
- Helicopter Challenge: Give each child identical supplies and see who can design a helicopter that spins the longest.
- STEM Fair Project: Use paper helicopters to demonstrate how engineers and scientists test multiple designs to improve performance.
- Math Connection: Measure blade length, time the spin, and chart results to show data visualization.
- Nature Tie-In: Compare the helicopter’s motion to maple seeds or other spinning seeds found outdoors.
Making It More Advanced (For Older Kids)
If you’re teaching older children, expand the activity:
- Measure Drop Time: Use a stopwatch to time how long the helicopter takes to hit the ground.
- Record Spin Speed: Mark one blade with a colored dot and record the drop with a phone camera, then count spins in slow motion.
- Calculate Air Resistance Changes: Discuss how doubling the weight (adding another clip) affects speed and stability.
- Introduce Engineering Concepts: Talk about how helicopters need tail rotors to balance torque, linking this to the paper design.
Safety and Practical Tips
- Supervise younger children when using scissors.
- Drop the helicopters in an open space away from fans or vents that might alter the results.
- Use recycled paper to keep the project environmentally friendly.
- Encourage cleanup after experiments—teaching responsibility along with science.
Real-Life Applications of This Simple Lesson
Paper helicopters don’t just teach abstract ideas; they introduce kids to real-world applications:
- Aviation and Engineering: Understanding how blades interact with air is key to helicopter design.
- Environmental Science: Observing maple seeds shows how nature uses similar mechanics.
- Physics Careers: Demonstrating how experiments lead to discoveries encourages kids to consider STEM careers.
Wrapping It All Up
A paper helicopter is more than a toy—it’s a gateway to science learning. It teaches children:
- To ask questions and explore “what if?” scenarios.
- How forces like gravity and air resistance affect everyday objects.
- That simple materials can lead to meaningful discoveries.
Whether you are a parent wanting an educational rainy-day activity, a teacher preparing a STEM lesson, or a caregiver looking for creative play, paper helicopters provide a fun, safe, and highly educational experience.
So grab a sheet of paper, make a few cuts and folds, and let the physics learning begin. You might just inspire the next generation of engineers and scientists—one spinning helicopter at a time.

I’m a longtime enthusiast of creative play and creative magic. I’m passionate about transforming everyday materials into extraordinary fun. I explore, test, and refine each project, ensuring it sparks joy, fuels imagination, and is delightfully achievable for families and educators. Driven by the belief that the best toys often come from imagination. I love empowering others to create playful memories.