
Craft magical DIY wind chimes with kids! Learn how simple materials create mindful listening moments & sensory play. Eco-friendly fun!
The joy of crafting toys with children goes far beyond the finished product. It’s about shared moments of creativity, problem-solving, and the tangible pride in making something unique. DIY projects teach resourcefulness, patience, and the magic of transforming everyday items into playful treasures. In our fast-paced world, finding simple ways to help children pause, focus, and connect with their surroundings is a precious gift.
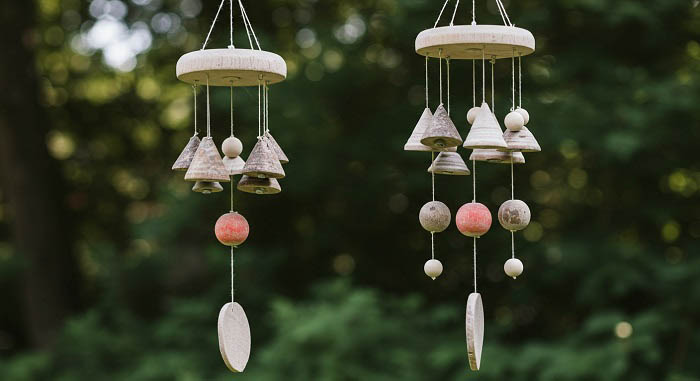
Enter the enchanting world of Whispering Wonders: DIY wind chimes designed not just for decoration, but for cultivating mindful listening. These gentle sound makers offer a beautiful bridge between creative expression and sensory awareness. By crafting their own chimes, children become active participants in creating a tool for calm and focus, fostering a deeper appreciation for the subtle sounds that often go unnoticed in daily life. This project perfectly blends eco-conscious crafting with meaningful sensory exploration.
The Magic of Mindful Listening for Little Ears
Mindful listening is simply paying full attention to the sounds around us, without judgment. For children, this practice can be incredibly grounding. It helps them develop focus, manage big emotions, and connect more deeply with their environment – noticing the rustle of leaves, the chirp of a bird, or the gentle tinkle of their creation. Whispering Wonders becomes a focal point for this practice, transforming abstract concepts into a tangible, beautiful experience. The act of listening to their chime becomes a mini-meditation, a moment of quiet observation amidst play.
Why DIY Wind Chimes are Perfect Sensory Play
Creating wind chimes engages multiple senses – touch while handling materials, sight while designing, and, most importantly, hearing. Selecting different materials allows children to predict and explore how each item might sound. Will this shell clink? Will that bead tap softly? This experimentation is core sensory play, building neural pathways and understanding of cause and effect. The resulting chime provides ongoing auditory feedback, a gentle soundtrack to their day that they helped compose. It’s a toy that grows with them, offering different levels of engagement.
Gathering Your Eco-Friendly Symphony
The beauty of Whispering Wonders lies in its simplicity and sustainability. Raid your recycling bin and nature walks! This project is a fantastic opportunity to discuss reusing materials and appreciating natural treasures. Here’s a guide to potential sound-makers:
| Material Type | Examples | Sound Characteristics | Preparation Needed |
|---|---|---|---|
| Natural Treasures | Seashells, smooth stones, pinecones, acorns, dried seed pods (e.g., lotus), bamboo pieces | Soft clicks, earthy taps, gentle rattles | Rinse, dry thoroughly |
| Recycled Objects | Old keys, metal bottle caps, small tin cans, cutlery (spoons/forks), ceramic tiles (chipped is fine!), beads (wood/glass/ceramic) | Bright pings, metallic rings, ceramic clinks, wooden taps | Clean thoroughly, sand sharp edges |
| Found Objects | Wooden dowels, driftwood, old CDs/DVDs, metal washers, nuts, bolts | Hollow knocks, metallic rings, shimmering vibrations | Clean, sand rough spots |
Essential Tools & Safety First
Safety is paramount. You’ll need:
- Strong String/Cord: Nylon cord, fishing line, sturdy embroidery thread, or jute twine.
- Scissors: Sharp enough for clean cuts.
- Drill & Small Bits (Adult Use ONLY): For making holes in harder materials like shells, stones, or wood. Always supervise children closely when drilling.
- Alternative to Drilling: Strong glue (like E6000) for attaching string loops to non-drillable items (test first!). Use glue in a well-ventilated area; adult application recommended.
- A Support Structure: A sturdy stick, a bent wire coat hanger, an embroidery hoop, or a small branch.
- Needle (Optional): For threading small beads.
Key Safety Tip: Always inspect collected materials for sharp edges or points. Sand down any roughness meticulously. Supervise children closely, especially during drilling, gluing, and when handling small objects that could be a choking hazard for younger siblings.
Crafting Your Whispering Wonders: Step-by-Step
- Material Prep (Adult Help Crucial): Wash and dry all found/recycled items. Drill small holes near the edges of shells, stones, tiles, wood pieces, or bottle caps. This step MUST be done by an adult or under extremely close adult supervision. For items that can’t be drilled (like acorns or delicate seed pods), carefully glue a strong loop of string to the top and let it cure completely.
- Design the Sound: Lay out your potential chimes. Encourage your child to gently tap them together or against a surface. Which sounds do they like? Do they want a mix of high and low tones? Group similar sounds or create a contrasting symphony. This is where mindful listening begins!
- Create the Hanger: Prepare your main structure. If using a stick or branch, ensure it’s sturdy. An embroidery hoop or bent wire hanger works well, too. Tie a strong loop of string at the top for hanging.
- String the Chimes: Cut varying lengths of your chosen string (differences in length create interesting sound patterns as they sway). Thread one end through the hole (or glued loop) of a sound-maker and tie multiple secure knots. For extra security, add a dab of glue over the knot (adult job).
- Attach to the Hanger: Tie the other end of each string securely to your main structure (stick, hoop, etc.). Space them out evenly or cluster them – it’s your design! Vary the lengths significantly for the best visual and auditory effect.
- Add the Clapper (Optional): For a traditional chime sound, create a central clapper. Tie a slightly heavier object (a smooth stone, a large bead, a small metal ring) to a string and hang it centrally, so it can swing and gently strike the surrounding chimes.
- Find the Perfect Spot: Hang your Whispering Wonders in a spot that catches gentle breezes – near a window, on a porch, or from a tree branch. Avoid strong winds initially that might damage it.
Personalizing Your Mindful Masterpiece
This is where creativity shines! Before stringing, children can paint designs on shells, stones, or wooden pieces. They can dye natural materials with safe, natural dyes (like beet juice or turmeric). Adding colorful beads between the hanger and the sound-maker not only looks pretty but can add subtle extra sounds. Encourage them to make it truly their own Whispering Wonder.
Engaging in Mindful Listening Practice
Once hung, guide your child:
- Pause: “Let’s be quiet for a moment.”
- Breathe: “Take a slow breath in… and slowly out.”
- Listen: “Close your eyes if you want. What sounds do you hear? Can you hear our wind chime? What does it sound like right now? Is it tinkling fast or slow? Is it one sound or many mixed?”
- Notice: “How does listening to the gentle sounds make your body feel?”
Keep it short, positive, and pressure-free. It’s about noticing, not achieving perfect silence.
The Lasting Tinkle of Whispering Wonders
Crafting these Whispering Wonders offers more than just a fun afternoon activity. It provides a tool for ongoing sensory exploration and moments of calm. Children gain confidence through creation, learn about reusing materials, and develop a valuable skill – mindful listening – that can help them navigate their world with greater awareness and tranquility. The gentle sounds they’ve created become a reminder to pause, breathe, and appreciate the simple, beautiful moments. Hang your chime, listen closely, and let the Whispering Wonders bring a touch of mindful magic to your child’s day. What gentle sounds will you create together?

I’m a longtime enthusiast of creative play and creative magic. I’m passionate about transforming everyday materials into extraordinary fun. I explore, test, and refine each project, ensuring it sparks joy, fuels imagination, and is delightfully achievable for families and educators. Driven by the belief that the best toys often come from imagination. I love empowering others to create playful memories.